Tutorial
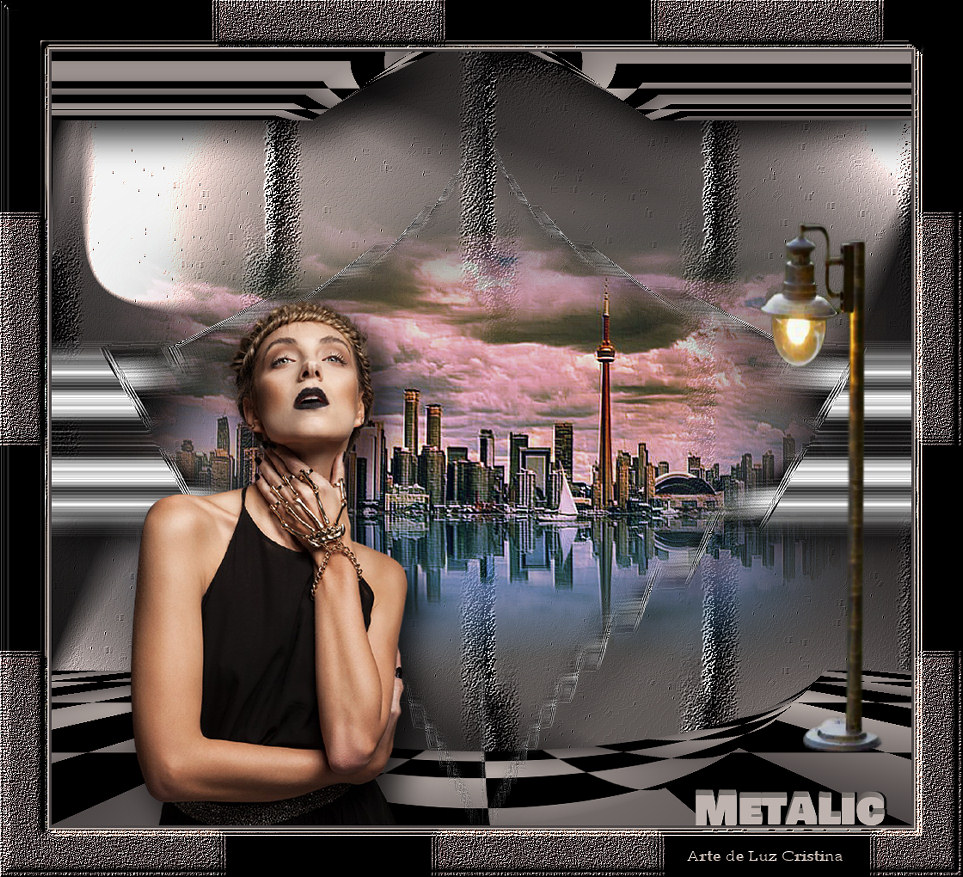
Metalic
Material:
Tres tubes
Un misted
Filtros:
Neology
Mehdi2
FMTT
L en K
Muras M. Perspective
Simple
Factory Gallery "S"
Usa la
Flechita
para Seguir el Tutorial
1.- Crear un paño de 1000px
X 900px
2.- Paleta de colores foreground #beb3ae background #4b4545
formar un gradiente sunburst con angle 0 repeats 0 y pintas tu paño
3.- Filtro Neology / digital weaver con 255 105
4.- Filtro Mehdi / flat median

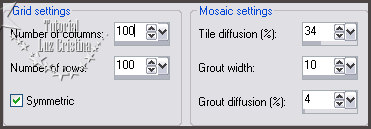
5.- Geometrics effects / mosaic antique por dos veces
6.- Texture effects / straw wall
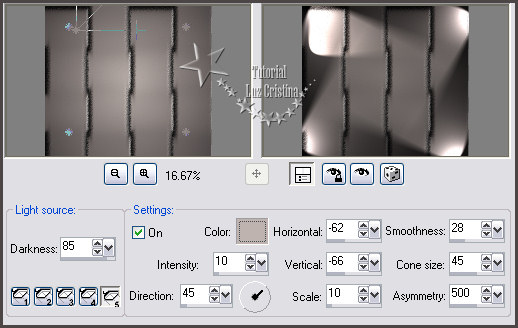
7.- Ilumination effects / Lights (color del foreground)
8.- Filtro FMTT / blend emboss
9.- New raste layer / pintar con el mismo gradiente
10.- Filtro L en K / L en Ks pia con 255
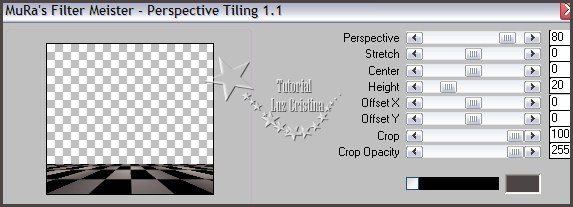
11.- Filtro Muras M. / perspective Tiling
12.- Geometrics effects / spherize con 100 elipse
13.- Layers / duplicate
14.- Filtro Simple / blintz default
15.- Image effects / seamless tiling por default
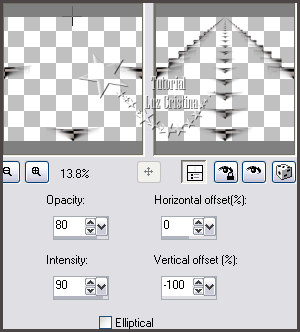
16.- Reflection effects / feedback
17.- Herramienta selection tool / custom selection
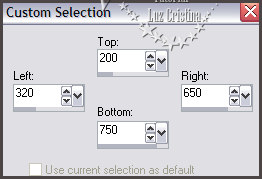
Tecla delete y selection none
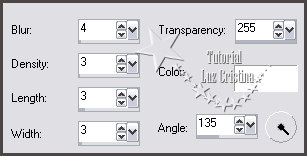
18.- Adjust / Blur / motion blur con 0 60
19.- Filtro Factory Gallery "S" / itsa edge thing con 0 0
20.- Filtro FMTT / saturation emboss
21.- Filtro Factory Gallery "S" / silver or gold con 56 0
22.- Adjust / sharpness / sharpen
23.- Filtro Simple / top left mirror por default
24.- Geometric effects / pentagon repeat / aplicas dos veces
25.- 3D effects / drop shadow con 20 15 80 50
26.- Copy el misted y paste as new layer / layers / arrange move down
27.- Distortion effects / punch / con 45
28.- Vamos a la raster 2 / layers duplicate / image / flip
29.- Geometric effects / pentagon repeat
30.- Image effects / offset con 0 100 transparente
31.- Repetir la misma drop shadow
32.- Copy el tube del farol y paste as new layer/ arrange bring to top /
acomodas como mi ejemplo
Copy el tube de la mujer y acomodas a la izquierda / poner la misma drop
shadow
Copy el texto y paste as new layer / acomodar
33.- Image add border con 3px color oscuro
add border de 2 px color claro
add border de 55px color oscuro
Seleccionar el último border con la magic wand
adjust / add remove noise / add noise con 20 uniforme mono
34.- Filtro L en K / L en Ks pia con 255
35.- Filtro Factory Gallery "S" / itsa edge thing con 0 0
36.- 3D effects / inner bevel

37.- Filtro FMTT / saturation emboss / lo apliqué dos veces, es opcional en
tus libres
38.- Selection none y resize en 86% o a su gusto
Hemos terminado, lo lograste y te felicito
Mis besitos amorosos como
siempre
!!!
Luz Cristina
"Soy feliz porque hago lo que me
gusta hacer"
Créditos:
Tutorial Metalic
Mexicali Baja California, México
21 de Febrero del 2023
Tubes.-Personales