|
Tutorial
Anairma
Material:
Un Tube
Un Texto
Una Textura
Una Imagen JPG
Filtros :
Factory Gallery "C"
Flood
Virtual
Painter4
Brush Strokes
FMTT
Bajar
Tutorial
Imprimir
Tutorial
1.-
Crear un pańo de 1000 X 900px
2.- Select all / copy la imagen JPG y paste
into selection / selection none
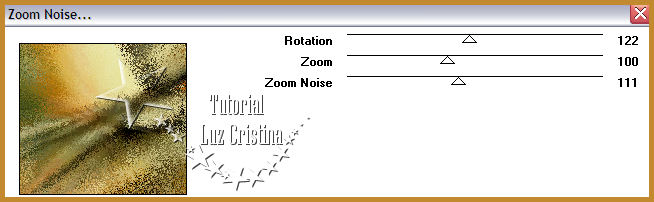
2.- Filtro Factory Gallery "C" / zoom noise
(en sus libres pueden mover los valores)
3.- Image flip (opcional en sus libres)
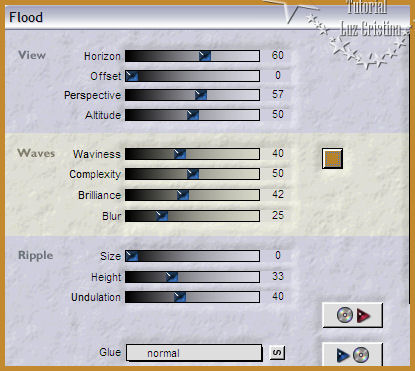
4.- Filtro Flood
5.- Filtro Virtual painter4 con old paiting
y canvas fine
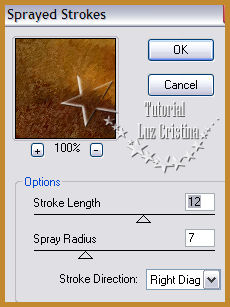
6.- Filtro Brush strokes / sprayed strokes
7.- Adjust / Brightness and contrast con -20
10 (opcional en sus libres)
8.- Layer / duplicate
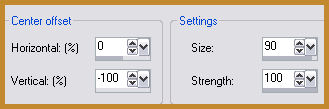
9.- Geometric effects / perspective vertical
con 90 transparente
10.- Image / flip y repetimos el paso
anterior
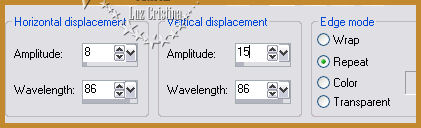
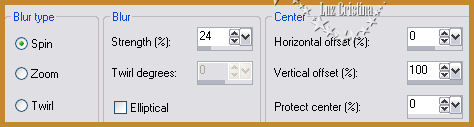
11.- Distortion effects / wave
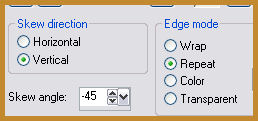
12.- Geometric effects / skew
aplicar dos veces
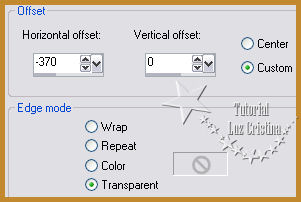
13.- Image effects / offset
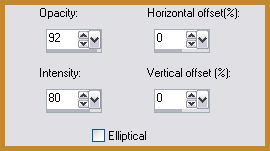
14.- Reflection effects / feedback
15.- Image / flip
16.- Masck marge topfade aplicar por dos
veces
Merge group
17.- Filtro FMTT / blend emboss
18.- Layers / duplicate
19.- Distortion effects / warp
20.- Layers / merge down
21.- Drop shadow con -12 -17 80 1
22.- Copy el misted de la escalera y paste
as new layer, mueva arriba a la derecha
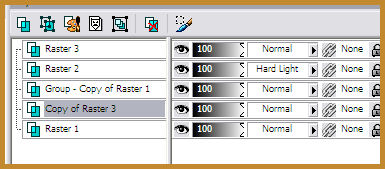
23.- Filtro FMTT / blend emboss. Poner la
raster en modo hard light
24.- Vaya a su imagen JPG y aplique la masck
20 21 por tres veces y merge group
25.- Copy y paste as new layer
26.- Resize solo esta layer en 120%
(opcional)
27.- Layers duplicate
28.- Blur / radial blur
29.- Layers / arrange / move down
30.- Distortion effects / polar coordinates
/ rectangular to polar transparente
31.- Filtro FMTT / saturation emboss
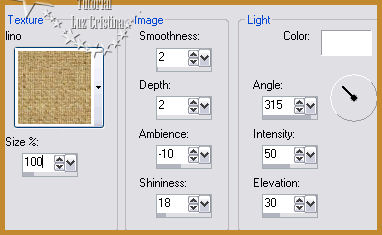
32.- Texture effects / texture
33.- Vayan a la raster 3 donde está el
misted del ángel y duplique
(opcional en sus libres este paso)
34.- Filtro FMTT / blend emboss
35.- Layers / merge down
36.- Coloque el arcoiris un poco a la orilla
del vestido del misted
37.- Drop shadow al arcoiris con 16 6 80 50
38.- Baje esta raster abajo de la figura de
la izquierda como en mi ejemplo
39.- Image / add border de 6px symetric
color #3e2c10
add border 1px color #c2892f
add border 6px. color oscuro
add border 1px. color claro
add border 45px color oscuro
Seleccione el borde último
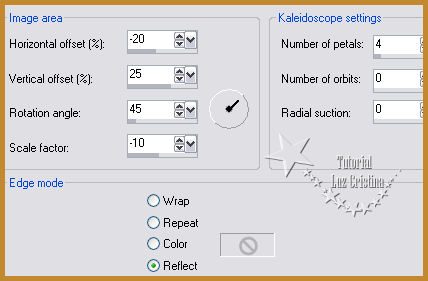
40.- Reflection effects / kaleidoscope
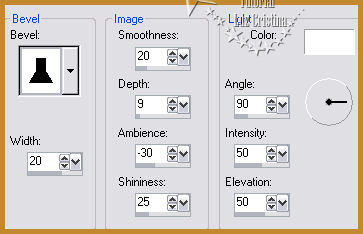
41.-3D effects / inner bevel
43.- Selection none / Resize en 85%
Copy el texto y paste as new layer y acomode
44.- Merge visible
Y muéstrame tu diseńo
Sean Felices !!!
Mis besitos amorosos como
siempre
!!!
Luz Cristina
"Soy feliz porque hago lo que me
gusta hacer"
Créditos:
Tutorial Anairma
Mexicali Baja California México
6 de agosto de 2020
Tubes: Propio
y de La Red
WebMaster NC

|