1.- Crear un pańo de 1000 X 500px
2.- Copy la Imagen JPG / select all en el pańo y paste into selection la
imagen
Selection none
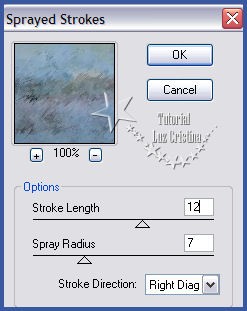
3.- Filtro Brush strokes / sprayed strokes
4.- Filtro FMTT / saturation emboss
5.- Canvas size 1000 X 900 px. 0
400 0 0
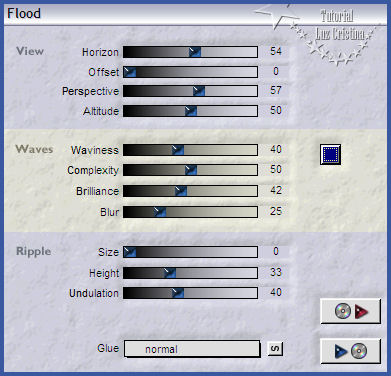
6.- Filtro Flood
7.- Aplicar la masck marge-topfade y merge group
8.- New raster layer / arrange send to bottom y vamos a pintar con un
gradiente
linear hecho con los colores en el foreground #c5833d y
background #3a589f
angle 0 repeat 0
9.- Regresamos a la raster donde tenemos el paisaje
Layers / duplicate
10.- Geometric effects / perspective horizontal con 95 transparente
11.- Image / mirror y repetimos el paso 10
12.- Reflection effects / feedback
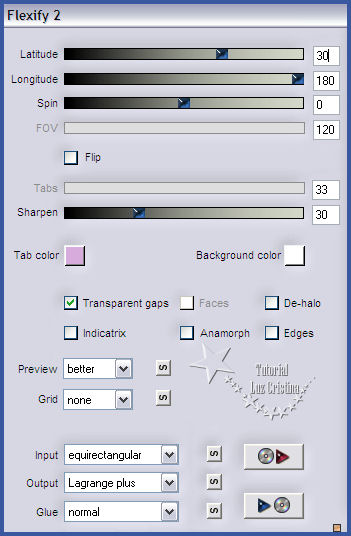
13.- Filtro Flexify2
14.- Layers / duplicate / image / flip
15.- Merge down
16.- Drop shadow con 20 15 80
60
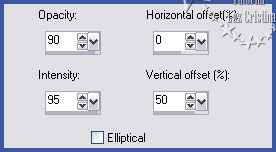
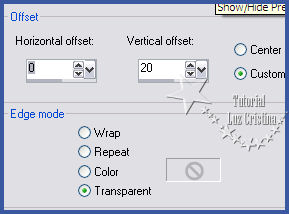
17.-Image effects / Offset
18.- Filtro FMTT / Blend emboss
19.- Layers / duplicate. Arrange move down
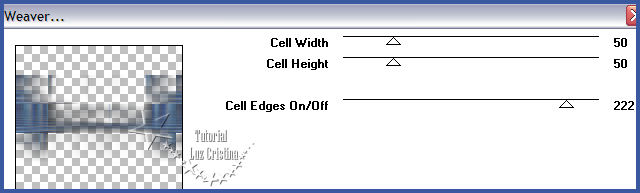
20.- Filtro Toadies / weaver
21.- Filtro FMTT / saturation emboss
22.- Geometric effects / persepective vertical 70 transparente
23.- Poner la misma drop shadow
24.- Merge visible
25.- Filtro AAA frames / fotoframe por default con width en 30
26.- Aplican su tube ponen la misma drop shadow y merge visible
Besitos amorosos como siempre
!!!
Luz Cristina
"Soy feliz porque hago lo que me
gusta hacer"
Créditos:
Tutorial Azul
5 de
septiembre del 2018
Mexicali Baja California
México
Tubes: propios