|
Tutorial Grisi
Material:
Filtros:
PhotoSwizzle
Toadies
Simple
PhotoEffex
FMTT
Muras M. Tone y
perspective tiling
Factory Gallery "M".
1.- Crear un pańo de 1000 X 900px
2.- Pintar el pańo con el color #b0d362
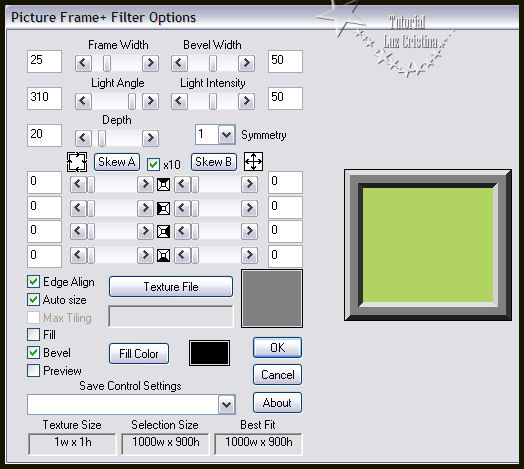
3.- Filtro PhotoSwizzle / picture frame+
4.- Seleccionar el centro con la varita mágica
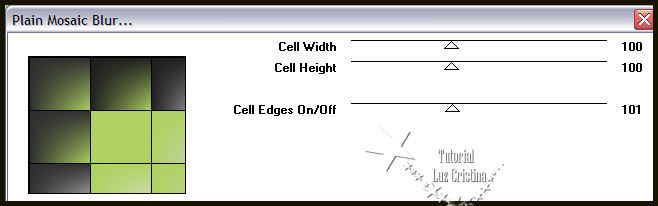
5.- Filtro Toadies / plain mosaic blur
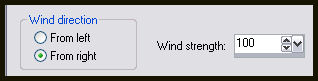
6.- Distortion effects / wind aplicar por 2 veces
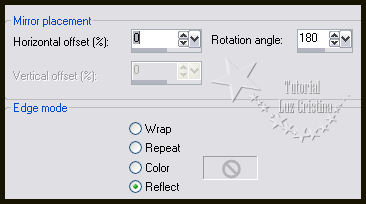
7.- Reflection effects / rotating mirror
8.- Filtro Simple / top left mirror
9.- Selection / invert
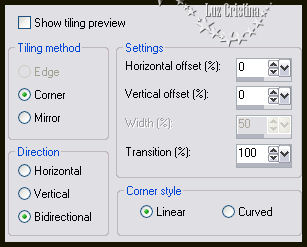
10.- Seamless tiling
11.-Reflection effects / rotating mirror igual al paso anterior el 7
12.- Selection / invert y repetimos el seamless tiling
13.- Selection / invert
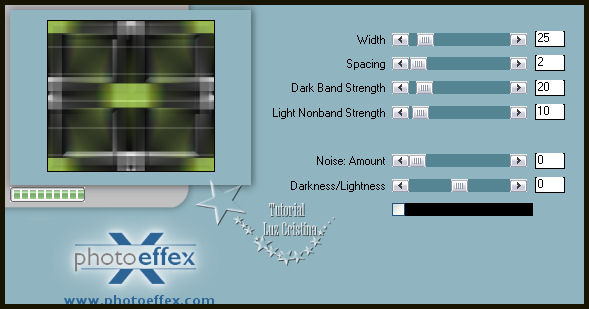
14.- Filtro PhotoEffex / scanlines
15.- Filtro FMTT / saturation emboss
16.- Selection / invert y aplicamos de nuevo el filtro FMTT / saturation emboss
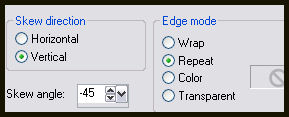
17.- Filtro Muras M. / Tone

18.- Filtro FMTT / blend emboss
19.- Layers / duplicate
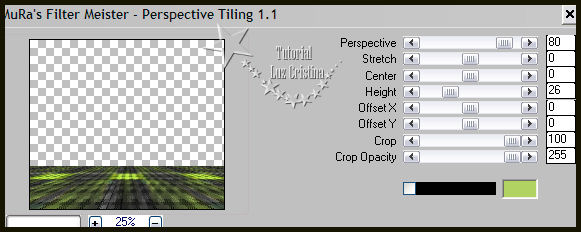
20.- Filtro Muras M. / perspective tiling
21.- Layers / duplicate / Image / flip
22.- Selection None
23.- Layers / Merge / merge down
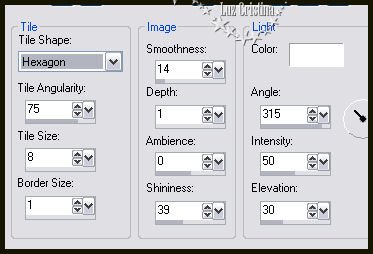
24.- Drop shadow con 10 16 80 50
Drop shadow con -10 -16 80 50
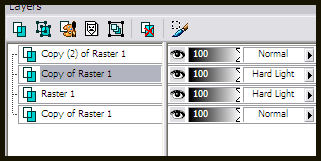
25.- Layers / duplicate
26.- Geometric effects / perspective vertical con -90 transparente
27.- Herramienta raster deform tool bajamos la figura hasta el 800px
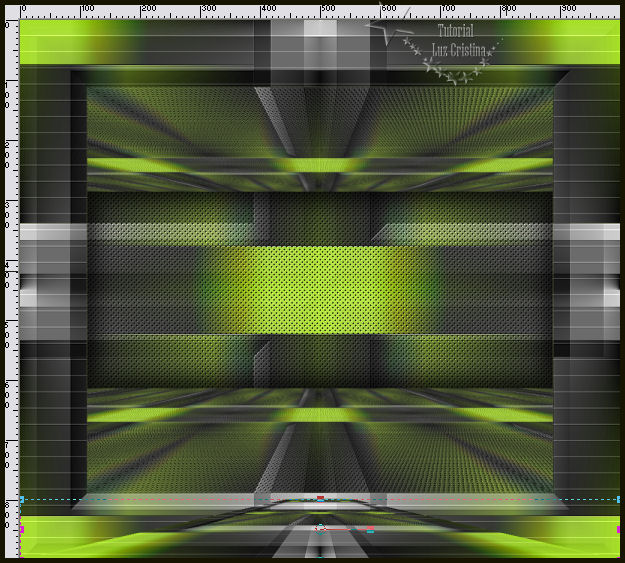
28.- Geometric effects / skew
29.- Reflection effects / rotating mirror igual configuración anterior
30.- Configurar la herramienta Warp brush así


Con la regla nos paramos en los 700 px y damos un clic sostenido hasta
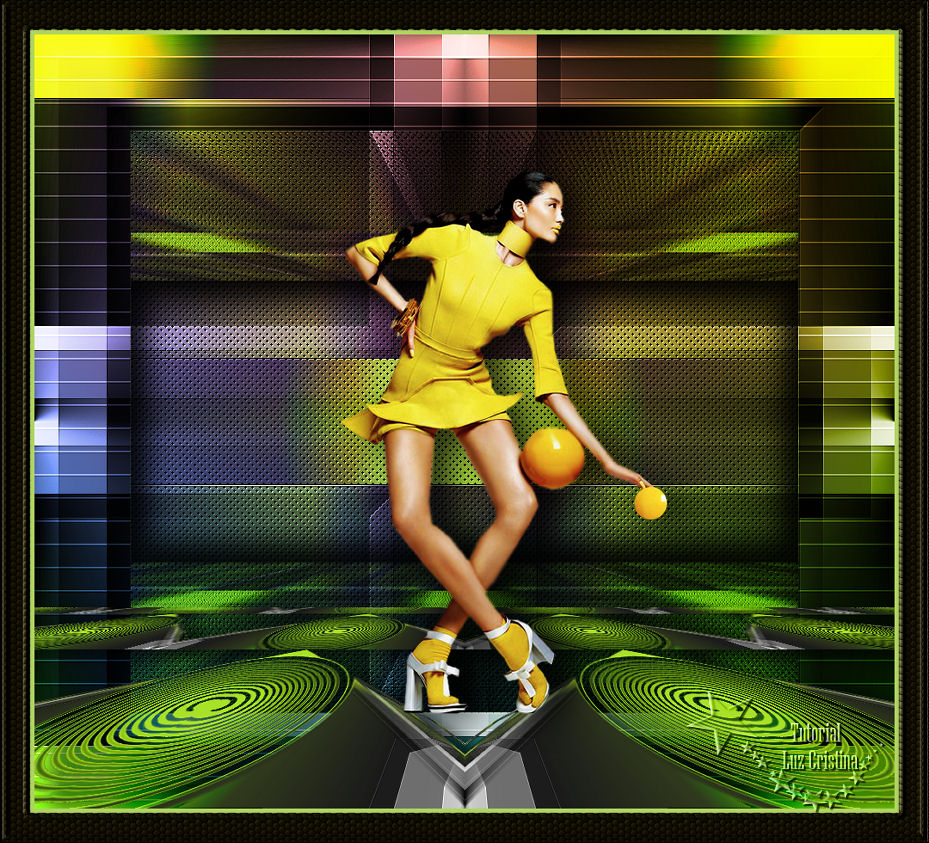
que vean se han hecho los círculos

31.- Reflection effects / rotating mirror igual
32.- Repetir el paso del filtro Muras M. Perspetive tiling
33.- Drop shadow con 7 20 80 30
34.- Nos paramos en la raster 1 / Layers duplicate
35.- Filtro Factory gallery "M" / ambrosia y le aplicamos por default
36.- Layers / arrange / send bottom
37.- Ponemos la raster 1 en el blend mode de hard light y la que tenemos arriba
también
Así van mis raster layer. (Es opcional los blend mode son a gusto)
38.- Add borders de 5px. symmetric color verde o el que usaron para su pańo
39.- Add borders de 35px. color #181402
40.- Seleccionan el borde oscuro con la varita mágica
41.- Texture effects / tiles
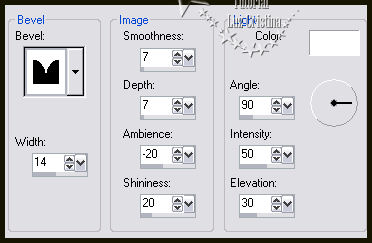
42.- 3D effects / inner bevel
43.- Selection none. Resize a 86%
44.- Colocan el tube y le ponen una drop shadow de 7 20 80 50
45.- Merge visible
Mis besitos amorosos como siempre
!!!
Luz Cristina
"Soy feliz porque hago lo que me
gusta hacer"
Créditos:
Tutorial GRISI
15 de septiembre de 2019
Mexicali Baja California México
Tubes: Propio
WebMaster NC

|