Tutorial
Mariana
Material:
Filtros:
Eye Candy5 / texture
Muras M. / perspective y copies
Mehdi2
FMTT
Simple
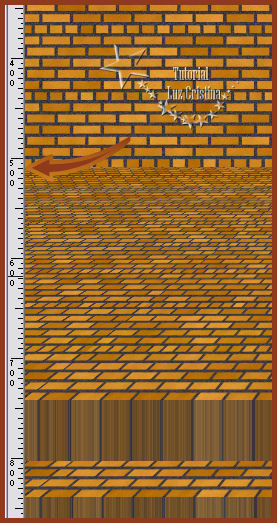
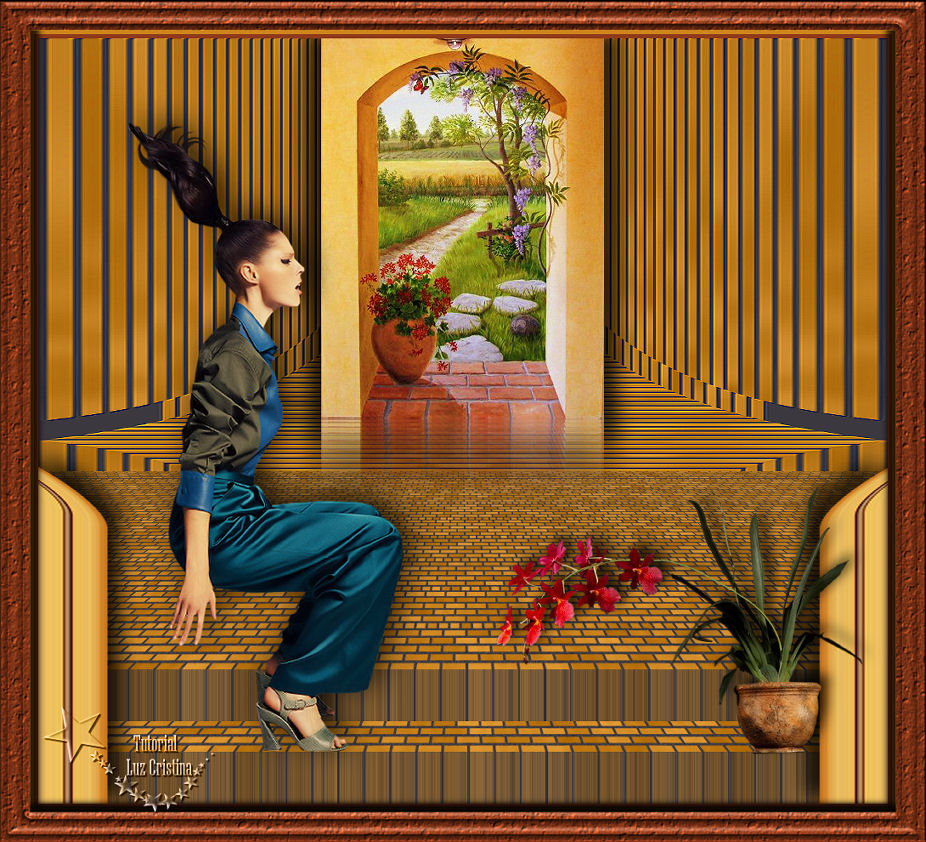
1.- Crear un pańo de 1000 X 900px
2.- Paleta de colores foreground #cd841b
background #8f3a1a vamos a formar
un gradiente linear con angle en 0
repeat en 0. Pinta tu pańo
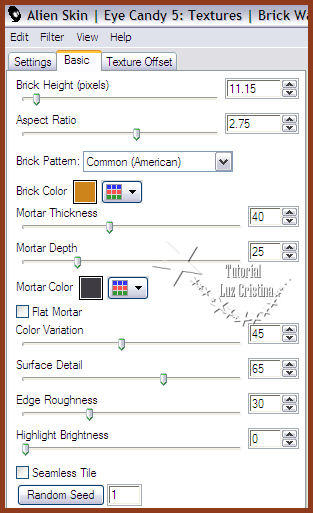
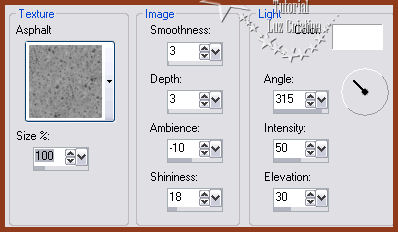
3.- Filtro Eye candy5 / textures / brick
wall
4.- Layers / duplicate
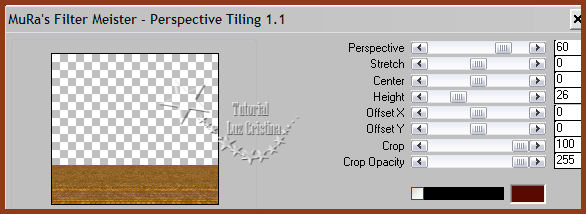
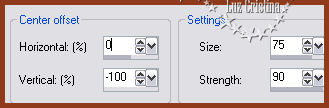
5.- Filtro Muras M. / perspective tiling
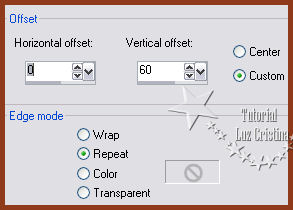
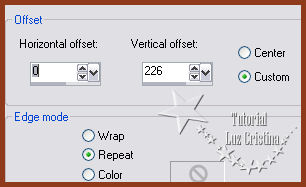
6.- Image effects / offset
7.- Layers / duplicate
8.- Con la herramienta move tool (mover)
le subimos en los 510px de largo
9.- Vamos a la raster 1
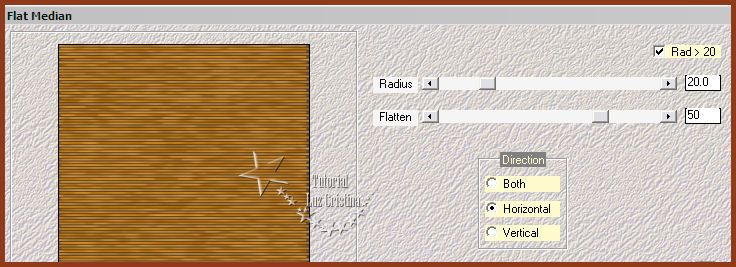
10.- Filtro Mehdi2 / flat median
11.- Image / mirror
12.- Reflection effects / rotating
mirror con 0 180 reflect
13.- Filtro Simple / blintz aplicar por
3 veces
14.- Distortion effects / pinch con 70 /
aplicarle 2 veces
15.- Reflection effects / rotating
mirror con 0 180 reflect
Filtro FMTT / blend emboss
16.- Copy la imagen JPG y paste as new
layer
17.- Layers / arrange bring to top
18.- Image effects / offset. Queda
exactamente en el borde del top
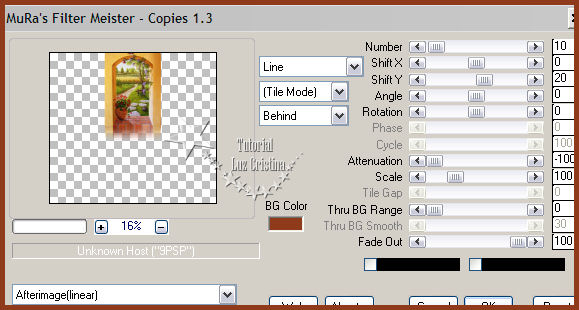
19.- Filtro Muras / copies
20.- Layers duplicate / arrange move
down
21.-Geometric effects / perspective
vertical con 85 transparente
22.- Image / flip
23.- Geometric effects / perspective
vertical con 85 transparente
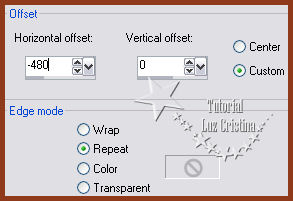
Offset
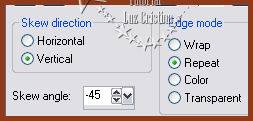
24.- Geometric effects / skew
Aplicar 2
veces
25.- Reflection effects / rotating
mirror con 0 180 reflect
26.- Distortion effects / warp
27.- Distortion effects / pinch con 70
28.- Drop shadow con -9 15 80 30
29.- Drop shadow con -9 -15 80 30
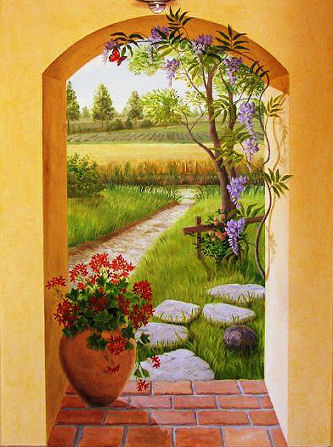
30.- Vamos a la puerta y colocamos la
misma drop shadow
31.- Coloquen el tube de la maceta y
acomodan
32.- Drop shadow con -9 10 80 20
33.- Ponga el tube y aplique drop shadow
a su gusto
34.- Image / add border de 5px simetryc
color oscuro
35.- Add border de 5px. color claro
36.- Add border de 35 px color oscuro
37.- Seleccione el último border y vamos
a texture effects
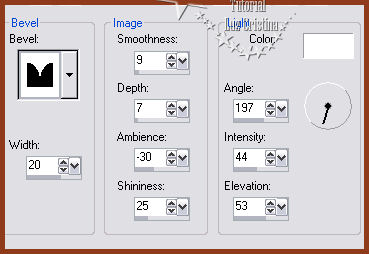
38.- 3D effects / Inner bevel
39.- Drop shadow -9 10 80 11
en negativo -9 -10 80 11
40.- Selection none
Resize en 85%