|
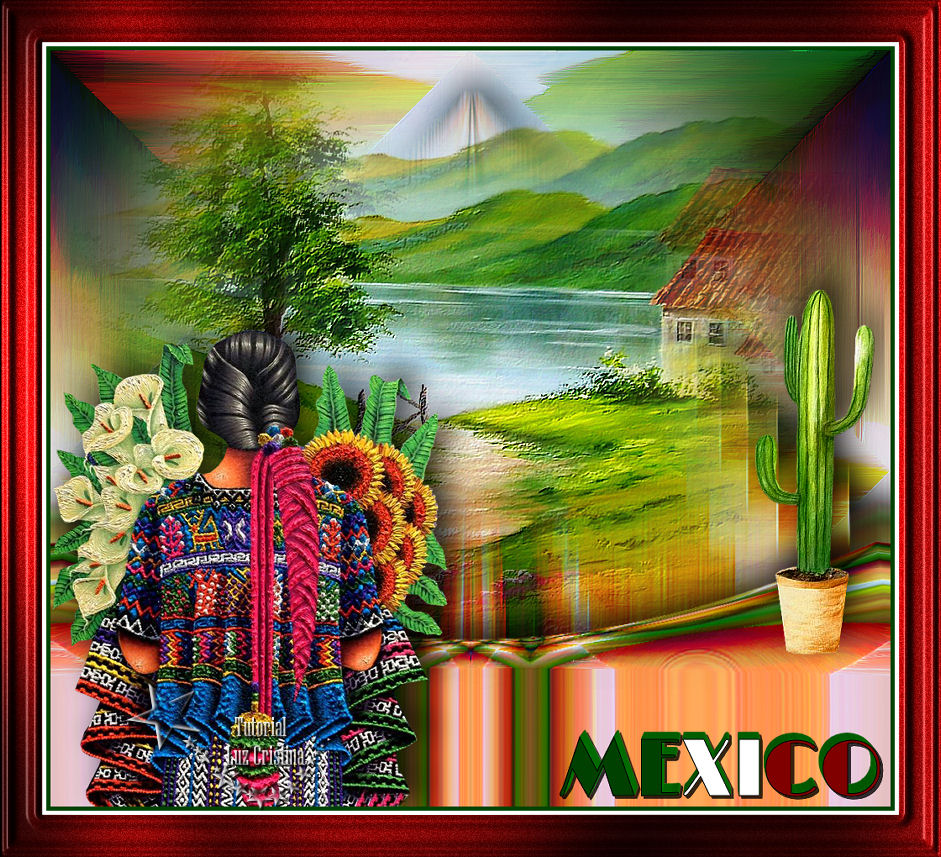
Tutorial "México"
Material:
Filtros:
Sandflower Specials
Mehdi
FMTT
Muras M.
Tramages
1.- Crear un pańo de 1000 X 900px
2.- Paleta de colores foreground #004302
background #ae974f
formar un gradiente linear con angle en
45 repeat 0 y pintan su pańo
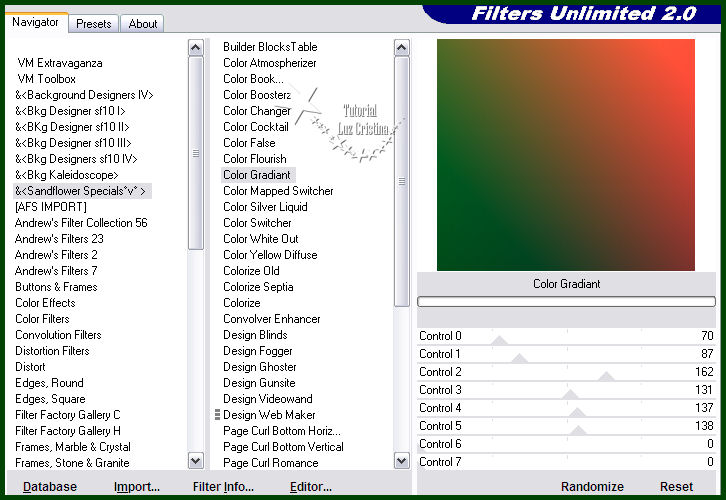
3.- Filtro & Sandflower specials / color
gradiant
4.-Select all/ copy el misted y paste
into selection / selection none
5.- Seamless tiling por default
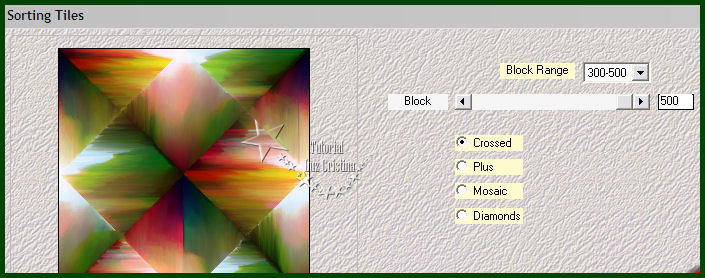
6.- Filtro Mehdi / sorting tiles
7.-Filtro FMTT / blend emboss por 2
veces
8.- Layers / duplicate
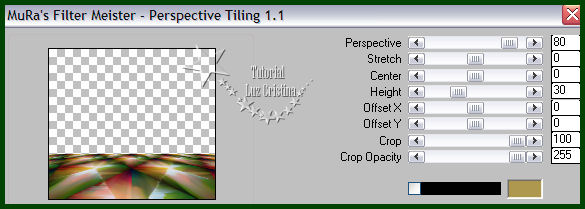
9.- Filtro Muras M. / perspective tiling
10.-Distortion effects / warp
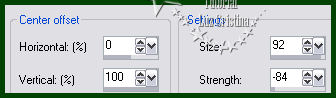
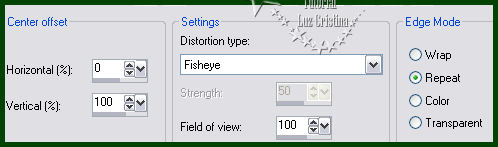
11.- Distortion effects / Lens
distortion X 2 veces
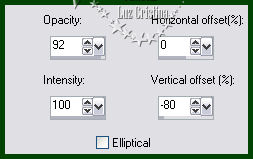
12.- Reflection effects / rotating
mirror con 0 180 reflect
13.- Filtro FMTT / saturation emboss
(opcional en sus libres)
14.- Layers / duplicate / arrange move
down
15.- Reflection effects / feedback
16.-Blur / motion blur

17.- User defined filter / emboss 3 (blend
mode de la layer en hard light es
opcional)
18.- Drop shadow -22 10 80 50
y apliquen la misma drop shadow a la
layer copy de la raster 1
19.- Copy el misted y paste as new layer
y acomode como mi ejemplo
van a duplicar el misted y bajan un poco
la copy para que se vea como en tercera
dimensión
Usé el filtro FMTT / blend emboss en la
copy del misted
20.- Copy el tube del cactus y paste as
new layer, apliquen la misma drop shadow
Pegue el texto de la misma manera y
ponga una drop shadow con 3 3 80 1
21.- Copy el tube y paste as new layer,
aplique drop shadow a su gusto
22.- Add border symetric de 5px color
verde del foreground de su paleta
add border de 5px color blanco
add border de 50px. color #8b0101
23.- Seleccione el último border con su
varita mágica
24.- Add remove noise / add noise con 20
uniforme mono
25.- Filtro Tramages / pool shadow por
default
26.- 3D effects / inner bevel
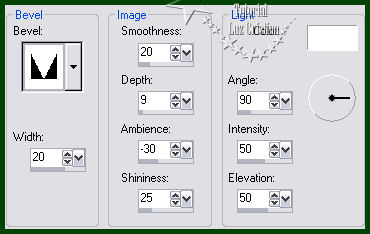
Selection none
27.- Resize en 84 %
Mis besitos amorosos como siempre
!!!
Luz Cristina
"Soy feliz porque hago lo que me
gusta hacer"
Créditos
Tutorial México de Luz Cristina
7 de septiembre de 2020
Mexicali Baja California
México
Tubes Propios
WebMaster NC

|