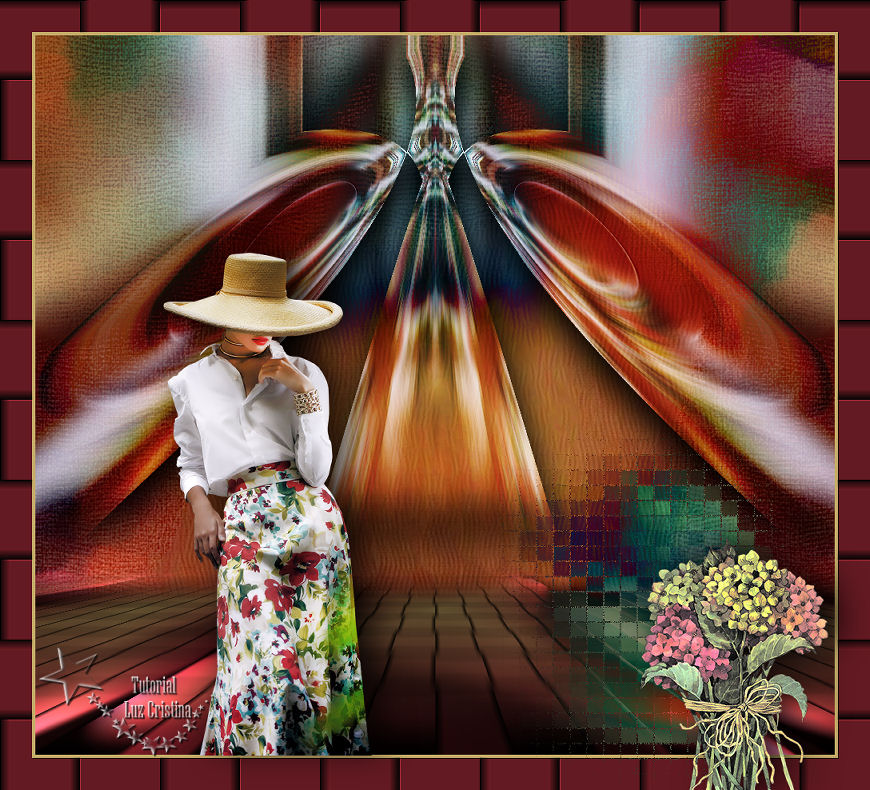
"Primavera
de Nuevo"
Material:
Dos
Tubes
Masck
FadeSuave
Filtros:
Neology
Muras M.
Perspective
Virtual Painter4
FMTT
1.- Crear un pańo de
1000 X 900 px.
2.- Paleta de colores
foreground #671820 background
#c6ac68
formar un gradiente
rectangular y pintar el pańo.
3.- Select all / copy
el tube de la mujer de smArt y
paste into selection / selection none.
4.- Seamless tiling
por default.
5.- Adjust / blur /
motion blur por 3 veces aplicar.
6.- User defined
filter / emboss 3.
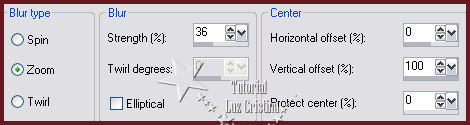
7.- Geometric effects
/ perspective vertical -60
transparente.
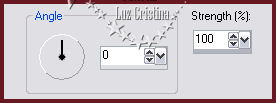
8.- Distortion effects
Warp:
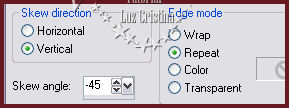
9.- Geometric effect
Skew:
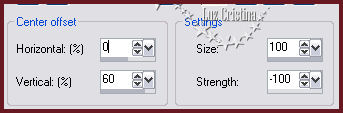
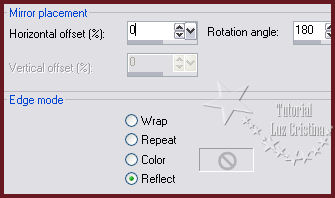
10.- Reflection
effects / Rotating mirror:
11.- Image / flip.
12.- Aplicamos la
Masck Fadesuave por 2 veces y merge group.
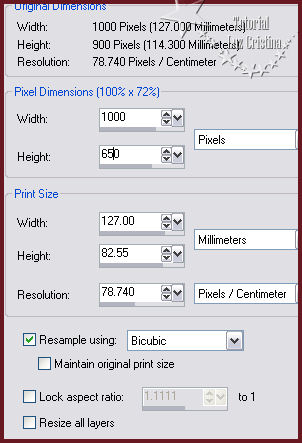
13.- Resize solo esta
layer así:
13.- New raster layer
/ arrange send to bottom y pintar mismo
gradiente.
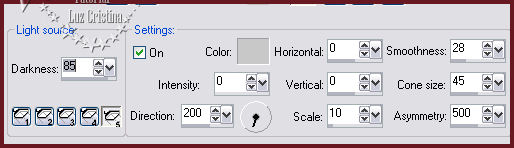
14.- Ilumination
effects / Lights:
15.- Layer /
duplicate.
16.- Filtro Neology /
Digital weaver con 100
105.
17.- Blur / motion
blur una sola vez:
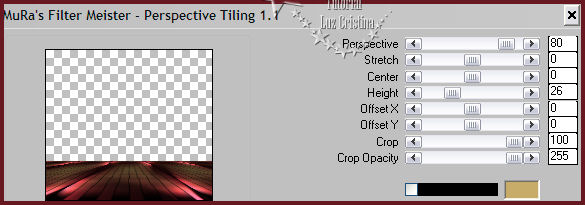
18.- Filtro Muras M.
perspective tiling:
19.- Cerrar las
otras 2 layer, configurar la varita mágica

seleccionamos la parte
transparente y dar a la tecla delete varias
veces
hasta difuminar el
borde.
Selection none.
20.- Nos paramos en la
raster layer de group raster 1.
21.- Layers /
duplicate / arrange move down.
22.- Blur / radial
blur:
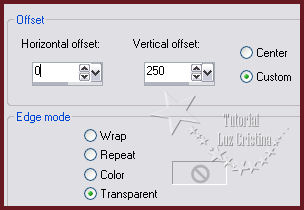
23.- Offset:
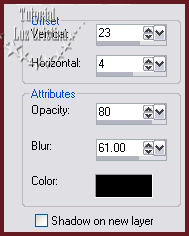
24.- Le aplicamos una
drop shadow así a las 2 layer, group raster
1
y a copy group raster
1:
25.- Vamos a la raster
1, la del fondo y aplicar el filtro Virtual
painter 4
Ponemos en Filter /
oil painting y en Material Canvas
(fine)
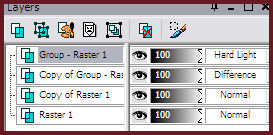
26.- Estos son los
blend mode de mis raster layer:
27.- Image / add
border simétrico de 4 px color #c6ac68
28.- Add border
simétrico de 40 px. color #671820
29.- Seleccionamos el
borde marrón con la varita mágica
y recuerden quitar el
40 de feather.
30.- Filtro Neology /
Digital weaver con 100
105.
31.- Filtro FMTT /
blend emboss. Selection none.
32.- Image / add
border simétrico de 4 px color
#c6ac68.
33.- Copy el tube
smArt y pegue como new layer.
34.- Drop shadow con
-8 19 80
60.
35.- Copy el tube de
Lory Rhae y pegue como new layer.
Acomode como en mi
ejemplo abajo a la derecha.
36.- Layer duplicate /
arrange move down.
37.- Blur / radial
blur con los valores anteriores.
38.- Image Mirror y
acomodamos atrás y a un lado del tube
original.
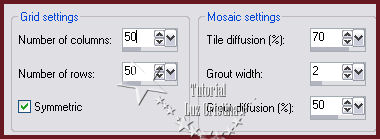
39.- Texture effects /
mosaic antique:
40.- Puse el blend
mode de esta layer en difference,
pongan a su gusto.
41.- Merge Visible.
42.- Resize en
porcentaje de 80%.