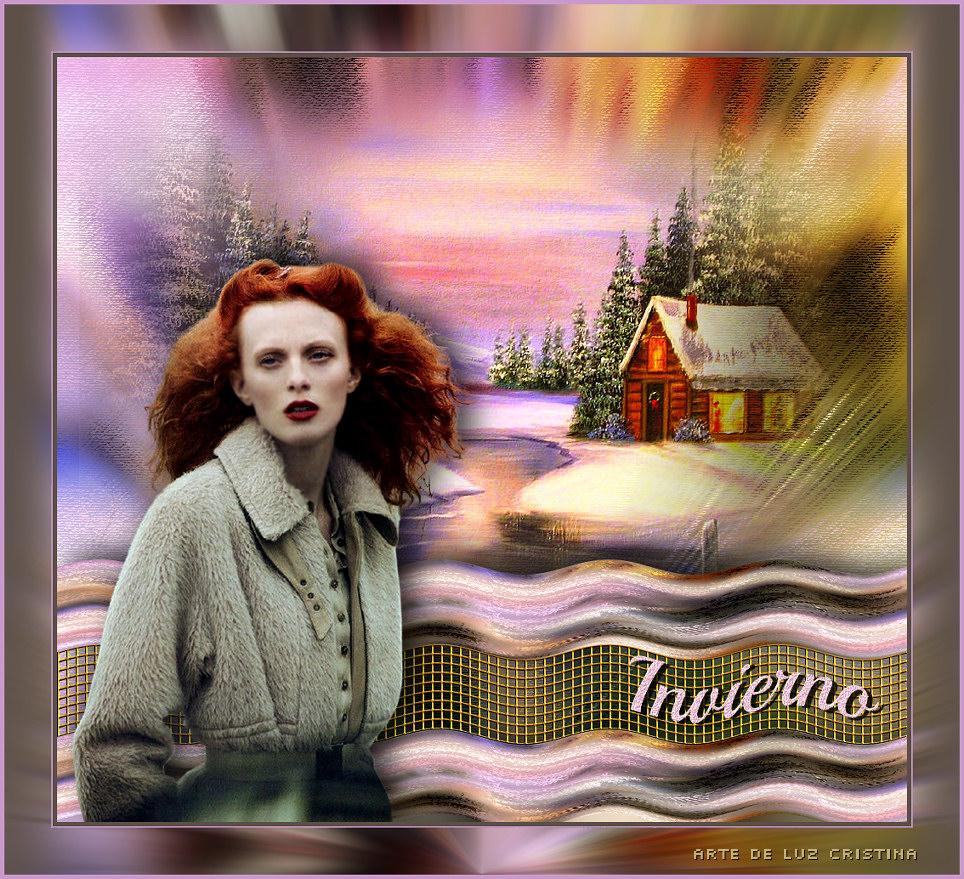
Tutorial
Invierno
Material:
Bajar Material
2 Tubes
1 Imágen
Pattern Gold
Filtros:
Artistic
VM Toolbox
Factory "M"
FMTT
1.- Crear un pańo de 1000 X 900px.
transparente y Select all
2.- Copy la imágen JPG y paste into
selection / selection none
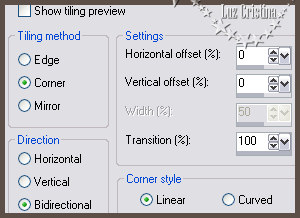
3.- Seamless tiling
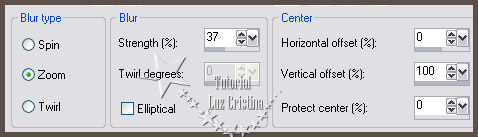
4.- Blur / radial blur
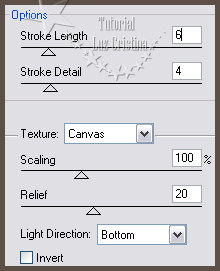
5.-Filtro Artistic / rough pastels /
aplicar 2 veces
6.-Copy su pańo / new raster layer
7.- Herramienta selection tool /
custom selection
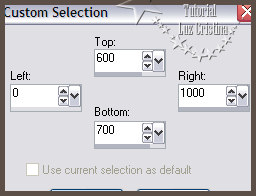
8.- Paste into selection la copy de
su diseńo / selection none
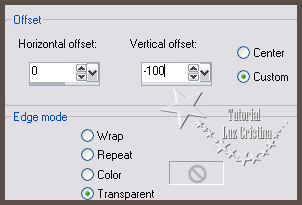
9.- Layers / duplicate
10.- Image effects / offset
11.-Cierra tu layer 1 y damos un
clic con tu varita mágica para
seleccionar la parte central de tus
dos barras

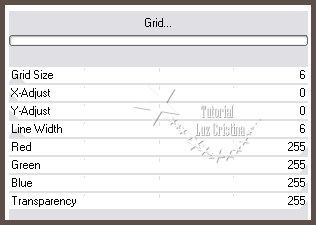
12.- Vamos al filtro VM Toolbox /
grid
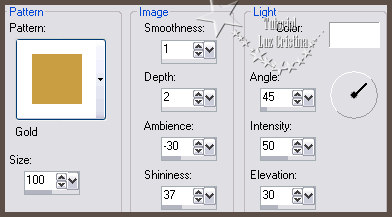
13.- Texture Effects / Sculpture con
el pattern gold adjunto
14.-Filtro FMTT / saturation emboss
/ selection none y abren su layer 1
de nuevo
15.- Seguimos parados en la copy de
la raster 2 / arrange merge down
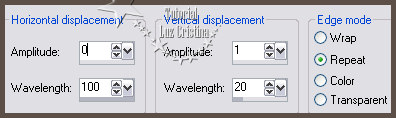
16.- Vamos a Distortion effects /
wave
17.- Drop shadow con -9 16 80 50
18.- Vamos a la imágen JPG y aplican
la masck 20 21 X dos veces y merge
group
19.- Copy su misted y paste as new
layer. Yo le di image mirror para
resaltar la casita
20.- Resize solo esta layer en 120%
Le acomodan simétricamente
21.- Layers / arrange move down esta
layer./ queda abajo de la figura que
hicimos
22.- Copy y pegue sus tubes igual a
mi ejemplo como new layers
23.- Al tube de la mujer le puse una
drop shadow igual a la anterior
usada
24.- Vamos a la raster 1 / layers /
duplicate / arrange move down
25.- Filtro Factory gallery "M" /
ambrosia por default / bajan la
opacidad de su layer en 70
26.- La raster 1 ponemos el blend
mode en hard light o a su gusto
27.- La raster 3 donde tenemos el
misted, apliqué el filtro FMTT /
saturation emboss
28.- Image / add border con 5px
color #5b4f47
add border de 2px color #c99ac9 en
sus libres cambien los colores a su
gusto
add border con 55px color oscuro
seleccionar el último border con su
varita mágica
29.- Filtro Simple / top bottom
groap
30.- Repetir el paso 4 del blur
31.- Add border de 5 px. color claro
32.- Resize en 85%
Mis besitos amorosos como siempre
!!!
Luz Cristina
"Soy feliz porque hago lo que me gusta
hacer"
Créditos
:
Tutorial Invierno
12 de diciembre del 2022
Mexicali Baja
California, México
Tubes
Personales
WebMaster NC