Usa la
Flechita
para Seguir el Tutorial
1.-Crear un paño de 1000
X 900px
2.- Paleta de colores /
foreground #98b128 y background
#136f64
Formar un gradiente linear con
angle en 0 repeats en 0 y pintas
tu paño.
3.- Layers / duplicate
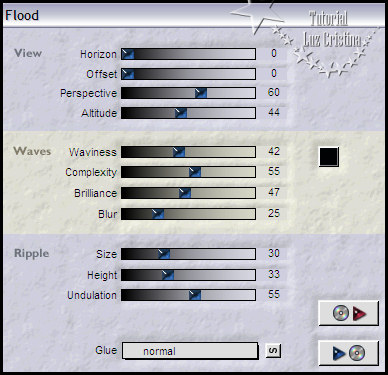
4.- Filtro Flaming pear / Flood
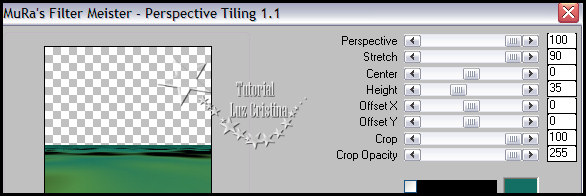
5.- Filtro Muras M. Perspective
tiling
6.- Layers / duplicate
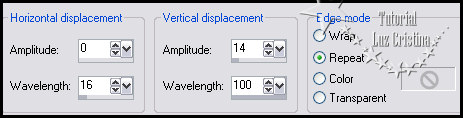
7.- Distortion effects / wave
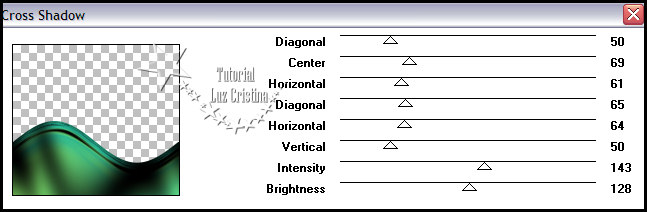
8.- Filtro Graphics plus / cross
shadow
9.- Vamos a la copy of raster 1
/ layers / duplicate
10.- Herramienta eraser tool así
configurada

Pasen la herramienta de
izquierda a derecha con un clic
sostenido
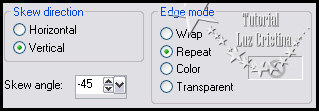
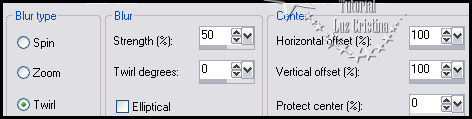
11.- Geometrics effects / skew
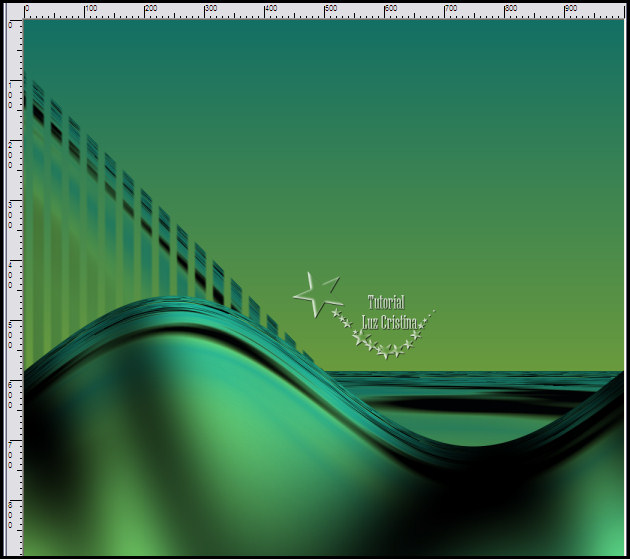
Así vamos hasta ahora
12.-3D effects / drop shadow con
1 3 80 1
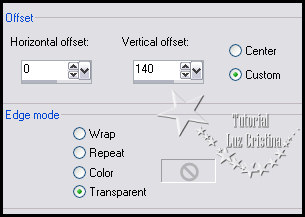
13.- Image effects / offset
14.- Filtro Simple / zoom out
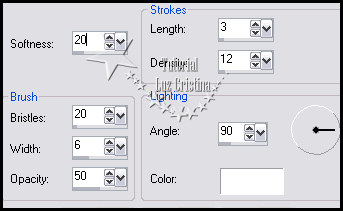
and flip por default
15.- Reflection effects /
rotating mirror

16.-Layers / arrange / move down
17.- 3D effects drop shadow con
0 0 80 50
18.- Copy su misted / paste as
new layer
19.- Repita el paso 13 del
offset
20.- Layers / duplicate / layers
/ arrange move down
21.- Adjust / blur / radial blur
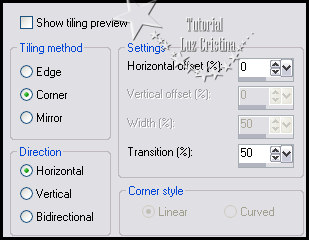
22.- Image effects / seamless
tiling
23.-Reflection effects /
rotating mirror igual al paso 15
24.- Texture effects / texture /
straw wall

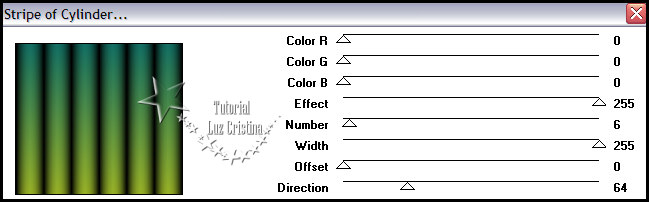
25.-Vamos a la raster 1 / Filtro
MuRas Seamless / stripe of
cilinder
26.- Filtro FMTT / saturation
emboss (opcional en sus libres)
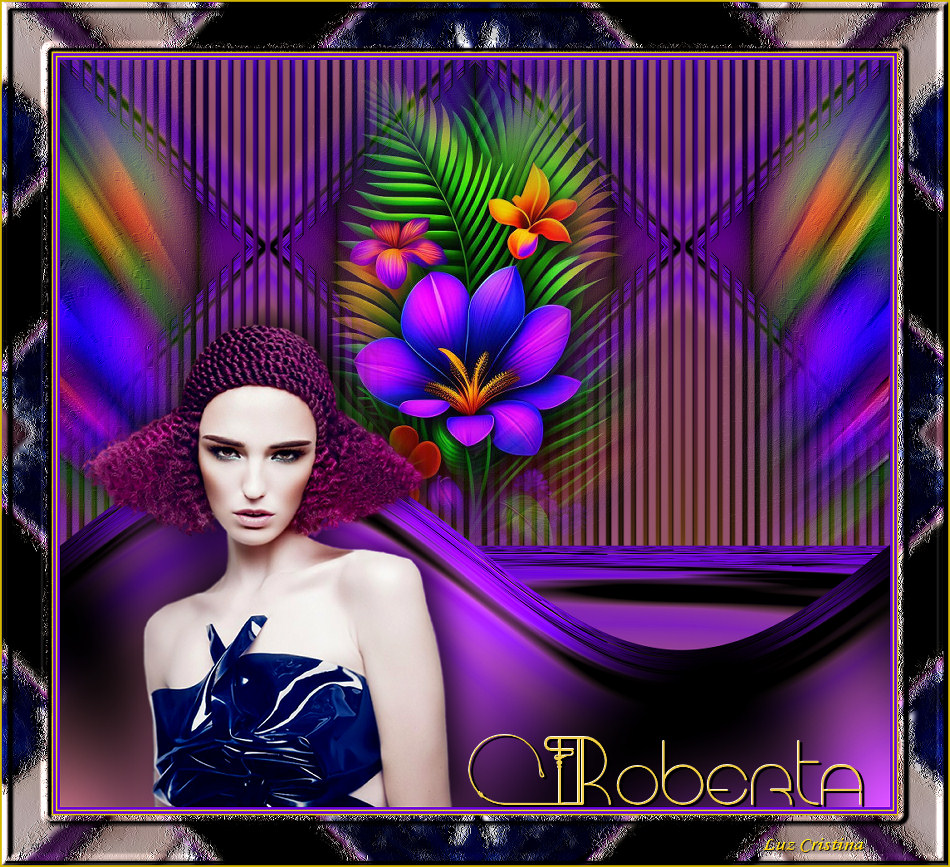
27.- Copy el tube de la mujer y
paste as new layer / layers /
arrange bring to top / acomode
como mi ejemplo.
28.- Drop shadow a su gusto
29.- Copy el texto y pegue, este
ya tiene drop shadow
30.- Image / add borders
add border de 3px color oscuro
add border de 2px color claro
add border de 3px color oscuro
add border de 2px color claro
add border de 60px color negro
Seleccione este último border
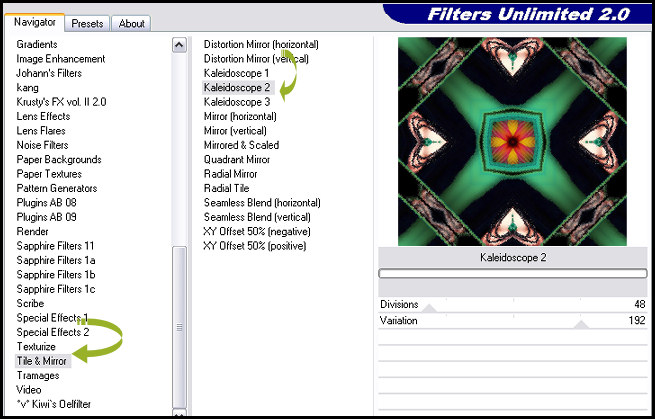
31.- Filtro Unlimited 2 / tile
mirror / kaleidoscope 2
32.- Effects / art media effects
/ brush strokes
33.- 3D effects / inner bevel
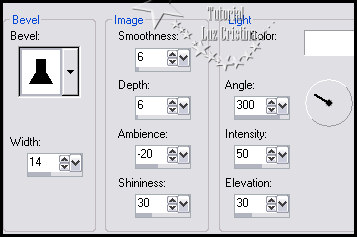
Selection none
34.- Add border de 2px color
claro.
Resize en 83%
Otro Ejemplo ...
Sean
Felices
!!!
Mis besitos amorosos como
siempre
!!!
Luz Cristina
"Soy feliz porque hago lo que me
gusta hacer"
Créditos:
Tutorial
Roberta
Mexicali
Baja
California,
México
24 mayo del
2023
Tubes
Personales