|
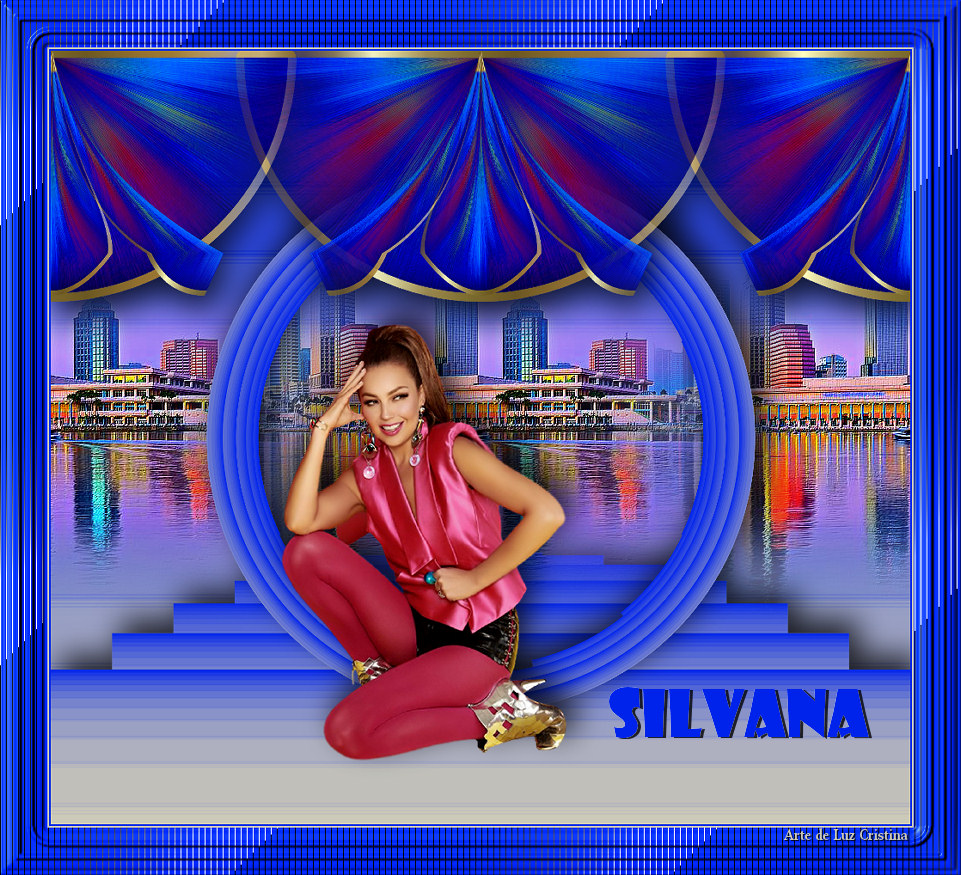
Tutorial Silvana
Material :
Bajar
Material
Una
Imagen
Dos Tubes
Un Misted
Un Gradiente
(Ponerlo en la carpeta de gradientes
en my PSP files)
Filtros :
Factory "S"
FMTT
Flexify 2
Muras M. Copies, perspective, pole
transform
Tramages
Usa la
Flechita
para Seguir el Tutorial
1.- Vamos a abrir en
nuestro PSP la im�gen Base
2.- Filtro Factory Gallery "S" / Itsa
edge thing por default 0
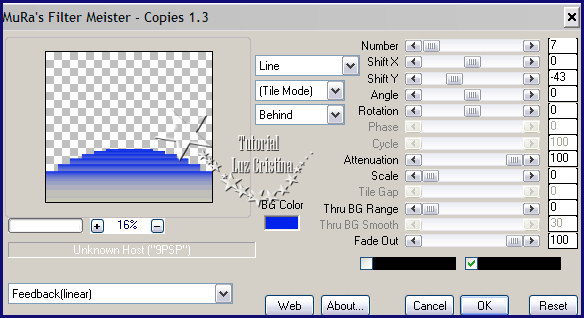
0
3.- Filtro FMTT / saturation emboss
por default
4.- Promote background a layer
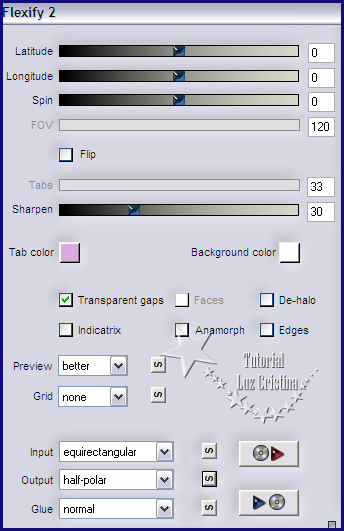
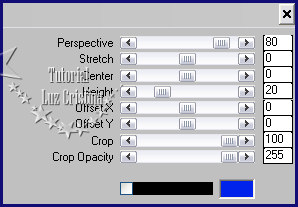
5.- Filtro / Flexify 2
6.-Resize solo esta layer en 55%
7.- Selections / Select all /
selections / float / selections / Modify
/ select selection borders
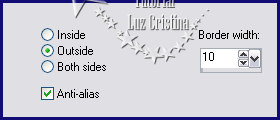
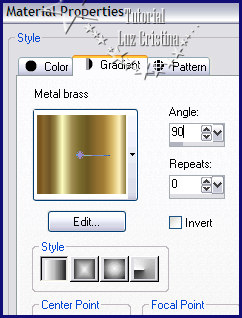
8.- New raster layer / pintar con el
gradiente dorado as� configurado
9.- Selection none / layers /Merge /
merge visible
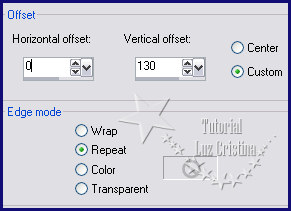
10.- Image effects / offset
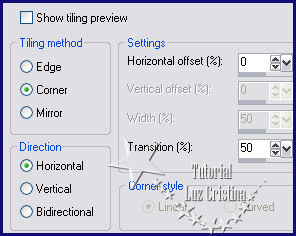
11.- Image effects / seamless tiling
12.-Layers / duplicate
13.- Geometrics effects / pentagon
/ transparente
14.- Distortion effects / pinch con
100
15.- Seamless tiling
igual que el anterior
16.- Layers / merge / merge down
17.- 3D effects / Drop shadow con
16 8 80 50
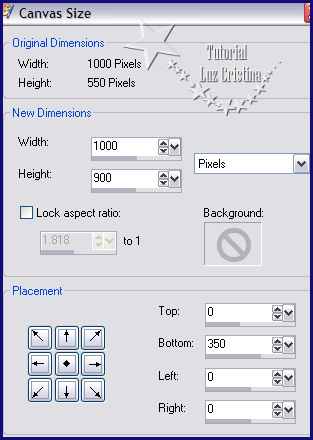
18.-Image / canvas size
19.-New raster layer / layers arrange
send to bottom
20.- Paleta de colores / foreground
#cecbb7 background #0023eb
formar un
gradiente linear con 0
0 y pintar el pa�o
21.-Distortion effects / pixelate con
80 80 symetric
22.- Filtro Factory Gallery "S" /
Itsa edge thing por default 0 0
23.- Layers / duplicate
24.- Filtro Muras M. perspective
tiling
25.- Layers / duplicate
26.- Filtro Muras M. Copies
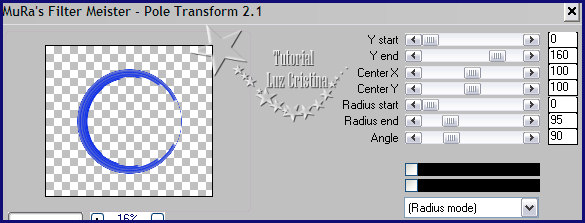
27.- Layers / duplicate
28.- Filtro Muras M. Pole transform
29.- Reflection effects / rotating
mirror con 0 180 reflect
30.- 3D effects / drop shadow con
-16 11 80 50
31.- Vamos a la copy (2) de la raster
1 y aplican la misma drop shadow
32.- Copy el misted y paste as new
layer
33.- Seamless tiling igual que el paso
11 / layers / arrange / move down
34.- Copy el tube y paste as new layer
y aplican la misma drop shadow anterior
Image / add border de 2px color
oscuro
add border de 2px color claro
add border de 55px color oscuro
seleccionar el �ltimo border
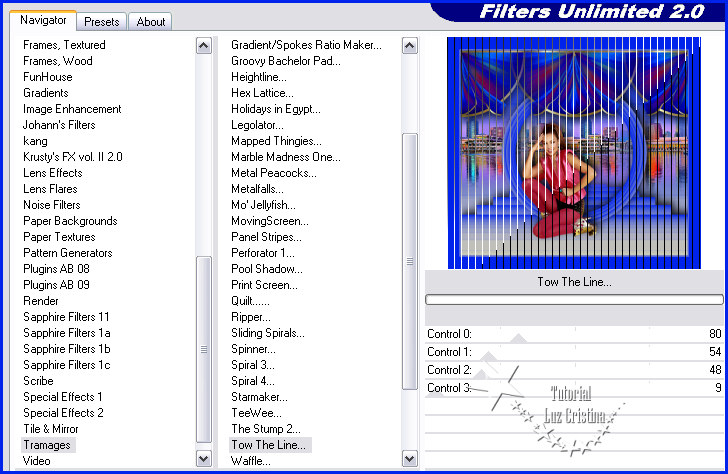
35.- Filtro Tramages / tow the line
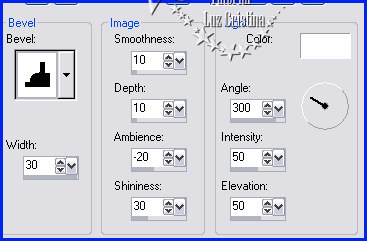
36.- 3D effects / inner bevel
Selection none
37.- Resize en 86%
Otro Ejemplo :

Mis besitos amorosos como siempre
!!!
Luz Cristina
"Soy feliz porque hago lo que me gusta
hacer"
Creditos
:
Tubes.-Personales, LB Tubes, Calguis
Mexicali Baja California, M�xico
10 de febrero de 2023
WebMaster NC
Volver
|