Tutorial L�neas
Material :
Bajar Material
Tres Tubes
Una Masck (no se el autor)
Filtros :
Graphics plus
Artistiques
MuRas Seamless
Simple
L en K
FMTT
1.-
Crear un pa�o de 1000 X 900px
2.- Paleta de colores foreground #f0a124
background #773f11, formar
un gradiente linear con angle 0 repeats 0 y
pintas tu pa�o con el.
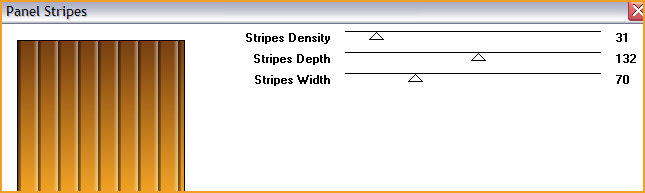
3.- Filtro Graphics plus / panel striper
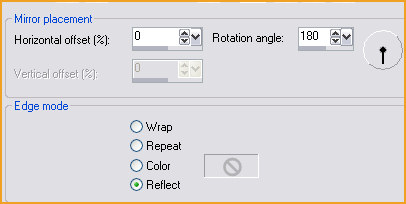
4.- Reflection effects / rotating mirror
5.-Adjust / add remove noise / add noise con
25 uniforme mono
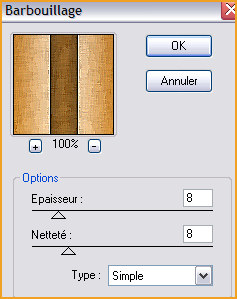
6.- Filtro Artistiques / Barbouillage
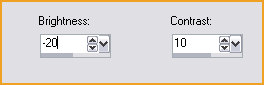
7.-Adjust / Brightness and contrast / lo
aplicas 3 veces.
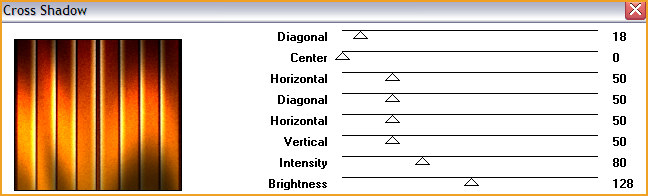
8.-Filtro Graphics plus / cross shadow
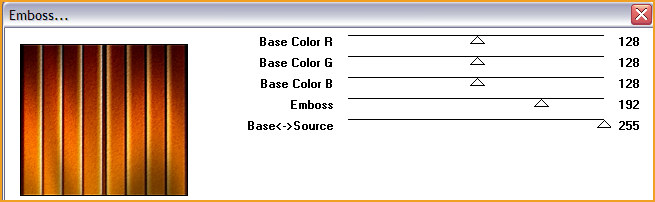
9.-Filtro MuRas Seamless / emboss
10.-New raster layer y pintamos de nuevo con
el mismo gradiente / Image / flip
11.- Aplicas la masck y merge group.
12.- Reflection effects / rotating mirror
13.- Filtro Simple / top left mirror
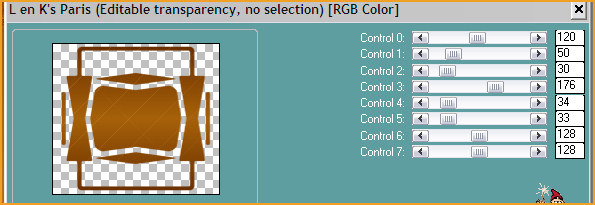
14.- Filtro L en K / Paris
15.-Reflection effects / rotating mirror
mismos valores anteriores.
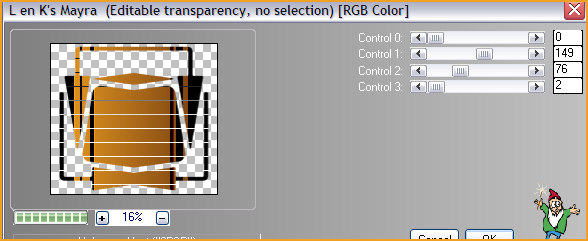
16.- Filtro L en K / Mayra
17.- Reflection effects / rotating mirror
mismos valores anteriores.
18.-3D effects / drop shadow con -10 20 80
50
19.- Filtro FMTT / saturation emboss /
layers / duplicate
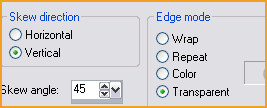
20.-Geometrics effects / skew aplicar 2
veces
21.-Reflection effects / rotating mirror
mismos valores anteriores.
22.- Filtro Simple / top left mirror
23.- De nuevo aplicar la misma drop shadow
24.- Layers / duplicate
25.- Distortion effects / Pinch con 100
26.- En la raster de copy of group of raster
2 / blend mode en difference (opcional en
tus libres)
27.- Copy los tubes y paste as new layer,
agregue la drop shadow a su gusto.
Vamos a hacer el borde.
Image add border de 3px color negro
add border de 2px color #f0a124
add border de 60px color negro
Selecciona el �ltimo border con tu varita
m�gica
Filtro L en K / Mayra mismos valores
anteriores
Reflection effects / rotating mirror mismos
valores anteriores.
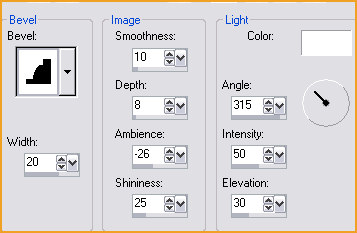
3D effects / inner bevel
Filtro FMTT / saturation emboss / selection
none
add border de 2px color #f0a124
Resize en 84%
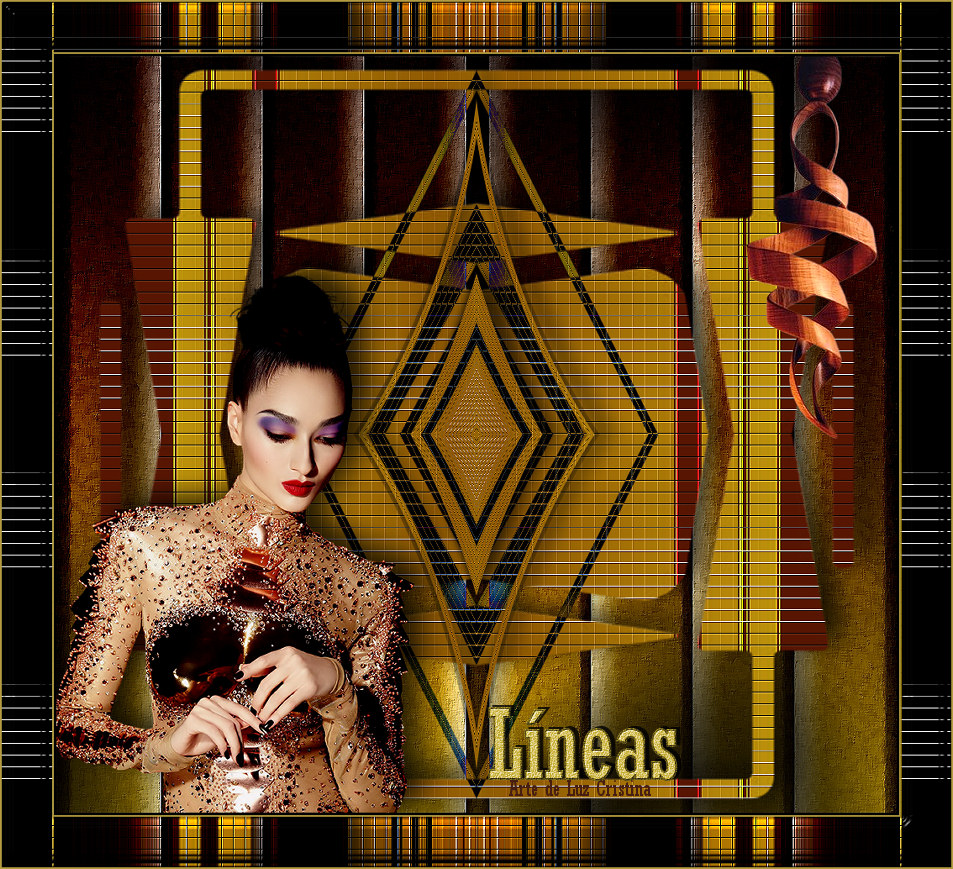
Otro Ejemplo ...
Sean Felices !!!
Mis besitos amorosos como
siempre
!!!
Luz Cristina
"Soy feliz porque hago lo que me
gusta hacer"
Cr�ditos:
Tutorial L�neas
Mexicali Baja California, M�xico
8 de Diciembre de 2023
Tubes Personales
WebMaster NC